Article By Bryan Catley and his Alligator Lines Copyright ©

The kit comes in a plastic jewel box and contains a number of different items: A twelve-page booklet of instructions stapled in the upper left corner, a “Guide to Better Structure Building” (for any and all structures) pamphlet; two sheets of roofing strips, a small sheet of signs, a small sheet of acetate (window glazing), six small sheets of laser cut kit parts, a small bag of cast white metal moldings and a piece of sponge rubber to prevent the contents shaking around too much.
The instructions are made up of seven pages of text instructions, three with photo steps and two with diagrams of the pieces. At this point they seem very detailed and complete but time will tell for sure! One aspect of them I don’t care for is that while they are specific to the N Scale kit they keep referencing the HO version of the kit! Strange!
One big difference, the HO kit has in addition to the three shacks, some fencing. The N version replaces the fence with a billboard that is identical to the one included with the Lunch Counter kit. Even so, the instructions still include the steps necessary to construct the fence
(and the billboard as well)!
I’m not sure that I would recommend this kit as a first time laser-cut kit. Maybe if you have built other kits, have patience and are prepared to handle the quite small pieces of trim (of which there are quite a few). There are no tabs and slots to help with alignment and the detail parts/trim are of the self adhesive variety; i.e., peel ‘an n stick.
Unless you want to do it anyway, painting can be kept as a minimum (natural wood appearance) but some really is necessary, mostly for the roofing and the siding on one of the shacks. Of course, some overall weathering would also be appropriate!
I decided to build the three structures in the one, two, three sequence and they will be presented in that same sequence.
Shack #1
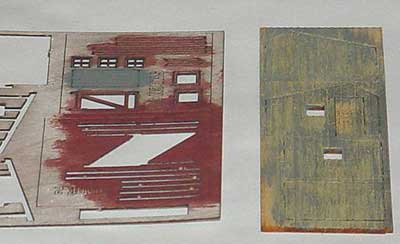
This is the smallest and most rundown of the three shacks. It has basic wood construction with a pre-cut paper overlay (peel ‘an n stick) that should be painted to simulate weathered tarpaper. This tarpaper is overlaid with a series of wood battens simulating how the tarpaper is being held in place.
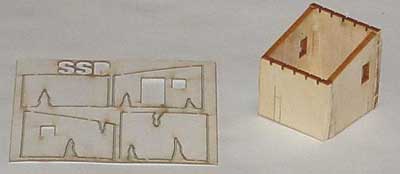
The basic structure is a base and the four walls. While basically plain, the walls do have a couple of scribed areas representing planks. These are designed to show through similarity placed rips in the tar paper!
You can paint the tarpaper before or after the tarpaper has been applied to the walls. But don’t get too heavy handed before application or you will cause the “stick” to not “stick”! Do the base colors (I used thin coat of light gray all over with some dark gray feathered in randomly) and finish up afterwards. For this step I used some green and brown, again feathered in.
The structure was now ready for the battens. These are a very interesting part of the kit and represent external strips of wood that are used to frame the doors and windows and to hold the tarpaper in place. They are peel ‘n stick and quite thin so great care is required in removing them from their container sheets. The instructions say to do the sides (with windows and the door) first followed by the ends.
The two sides are very straight forward, just carefully extract them, remove the backing and fix them in place. The ends are a little different; here we have several vertical battens but no crosspieces so, in order to avoid the need to place each batten in place individually they are cut a little longer than necessary and have cross pieces across the top (or bottom if you prefer). Once in place, lay the hut on its side and trim the cross piece off! Great idea. And it works! I would suggest, however, that you apply these two end pieces first. Difficult to explain why, but if you build the kit it will become quite obvious, quite quickly!
Note: I was not too happy with the strength of the “stick”. Too often pieces were moving out of position. In the end I covered the walls with a couple of coats of Dull Cote and that held them and improved the appearance!
The roof is next and is very straight forward. If you wish you can use a number of (provided) roof joists but this is not really necessary since they provide no extra support and cannot be seen anyway! The roof is covered with a series of roofing strips that overlap each other by a very small amount. No guides are provided so make sure the first strip is parallel with the roof edge and then insure all the other strips’ overlap by just a smidgen – just enough to provide a ridge along the edge! One corner of the roof is scribed so you can “rip” one (or two) of the strips to create an old and weathered appearance if you wish.
You can paint the roofing strips before applying them or after. I painted them after. They received a similar treatment to the walls but with a little more emphasis on the darker gray.
Note: The roof is almost square but not quite! Be careful as to how you orient it! I did it the wrong way! Only after applying the roofing strips and trying to set it in position did I discovered my mistake. But it was close so it could be worked with. One of the (unused) roof joists was placed along the front edge and then, once the roof was in place, a couple more joists were added on top of the roof to “hide” the error!
The final piece is the addition of the two windows. These are very small and the kit actually has four so if you do end up losing or breaking one you have a spare. In all honesty, given the run down appearance of the shack, the windows are really an optional feature.
If you are going to use them, be prepared to handle two very small pieces (which should have been pre-painted). Remove them, remove the backing and place them on the supplied sheet of acetate before cutting around them. Given the lack of strength in “stick” encountered so far, I left them under a weight overnight before cutting them out of the acetate sheet (with a very sharp knife). Because they were so small I used CA glue to position them. The window beside the door was glued in a partially open position; the other was glued closed.
A little paint touch-up and a little more Dull Cote finished the shack!
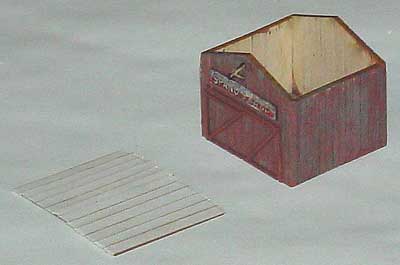
Shack #2
This is the biggest of the three shacks and is also very straight forward to put together (especially since it has no windows). It does, however, have a number of small (read thin) pieces of trim that must be cut and handled very carefully.
As is so often the case with these kits the walls and trim are primed and painted up front before anything else. I used a base color of a medium gray and then dry brushed various amounts of black, green and a red oxide on top making the sure the lower colors were showing through. Several (thin) coats were necessary to achieve the look I wanted.
The instructions say to assemble the walls on the base at this point but I decided to apply the door trim and sign first. I find the trim to be much easier to handle using this approach. The trim is thin and needs to be handled carefully. It is (again) of the peel ‘n stick variety and I found the stick to not be sticky enough. Once in place a weight was put over it for an hour or two and that helped.
The sign was a little easier. One of the signs was cut from the supplied sheet and glued to the wood strip and pressed into place on the front above the doors. Once dry it received a light sanding and coat of black wash to simulate weathering.
The four walls were then assembled onto the base. Go slowly and allow each part to dry until it is stuck but still moveable and then glue the next piece. You should have no problems getting the pieces in place at right angles!
When the walls were dry, they received a coat or two of Dull Cote which also helped to ensure the trim remained in place! The roof was next.
As before there was some scribing on the roof which could be displayed from behind torn roof pieces. I elected to cover the entire roof with the peel ‘n stick roof striping. Cover each side from the bottom overlapping each piece and leaving an uncovered strip across the top. This is then covered with another strip which acts as the roof cap.
The roof was creased down the middle, a very easy task since it is pre-scored, and glued into place. Once dry it was painted using a similar approach of medium gray and others colors dry brushed on. The final pieces of trim were then positioned into place under the roof line and more Dull Cote was applied to both the roof and walls to help with the appearance and to help fix the latest trim in place!
Note: I have used Dull Cote more than you might have to. The reason is that much of the paint I have used turned out to be glossy or semi-gloss and these shacks need a flat appearance! The extra benefit of helping to hold the trim in place was certainly beneficial though!
At this point the shack is basically finished except for the overhang and the “coal bin” under it!
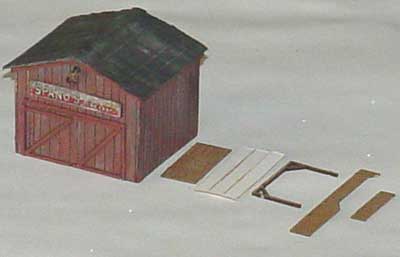
There are two “coal bins” included with the kit; a larger one and a smaller one. They can be used, or not used, in conjunction with any of the three shacks. The pictures and instructions include one with this shack and I used the larger one. (I don’t think I’ll use the smaller one but I will certainly keep it!
They are both laser cut into medium weight card stock. The bin itself is four sides stretched out into a single piece. It is cut, bent at the appropriate places and the ends are then glued together. Pretty straight forward but it can be tricky, both the bending and the gluing, mostly because it is quite small. The smaller one would be even trickier! The lid also caused issues; it is a separate piece but seemed to be a little small. You have to adjust its positioning to make it work! Once made, it can be glued to the side of the shack. At this point some black wash was applied but it was left in the basic wood color.
This leaves the overhang. Remove the roof from the container sheet and apply the roofing strips (if this is what you want to do). You can paint the roofing at this time or glue the support in place and then paint it.
Note: For reasons beyond my comprehension I glued the front supports in place before I did the roofing! Bad mistake since it makes applying the roofing strips much more difficult!
Anyway, once done the roofing strips were painted (the supports were left natural) and then glued into place. There are no guidelines for doing this. Just apply a little glue and position it by eye! Once everything was dry another coat of Dull Cote covered up some glossy paint and shiny dried glue spots!
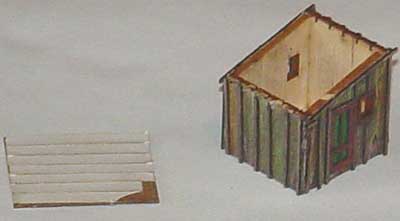
Shack #3
This is the middle sized shack although, truth be told, it is only a little bigger than the first one. It is basically very straight forward to put together but the trim is comprised of some very small and delicate pieces that need to be cut carefully, handled (very) carefully and which are supposed to be peel ‘an n stick (as is the trim for all the others) but had very poor sticking qualities.
As was the case with the others, a coat of Dull Cote ultimately provided the glue to hold them in place permanently! This kit also provided some window frames, a door and a door frame making it different from the other two.
The size of the windows and the door frame were a little large and some “adjusting” was necessary to get them to fit!
Note: They are too thin to consider trimming but I tried a little light sanding but this didn’t really help. In the end I just pushed the windows into place, causing minor damage to the window. But I didn’t mind since this was to be a very old shack anyway! (If I had wanted a brand new shack, I’m not too sure what I would have done).

The instructions for this shack are very sparse. They, essentially, say If you have built the other two you already know what to do and if you are starting with this shack then read the instructions for the other two first! Given the fact that is the only shack with separate windows and doors, they really should have included a word about these items.
Actually, they did. The windows may be glued in an open or closed position but as just noted, the windows are a little big for the frames so I’m not sure how an open position might be achieved!
As with the others, the pieces were primed and painted before anything else. Windows, doors, and signs were also positioned at this time. The completed walls were then glued around the base and the roof was covered in roofing strips, glued into place and then painted. Touch up painting on the walls was also applied. Trim and a coat of Dull Cote finished the shack off! I decide not to complete the second, smaller “coal bin” for this shack.
Note: The instructions recommend sanding the paper signs (on the back) to make them thinner and to provide a better appearance! This is the first time I heard about sanding paper signs! And it works really well! The front can also be sanded to simulated old age but be careful!
Once all three shacks are competed, you will most likely have quite a few pieces left over. Beyond the scrap pieces of wood, I had a complete sheet of roofing strips and most of the acetate sheet left over, not to mention a bunch of signs! Make sure you save them!