By Jim Wilson, Keystone State Railroad – “The Key to Industry”
NE30028 House Under Construction
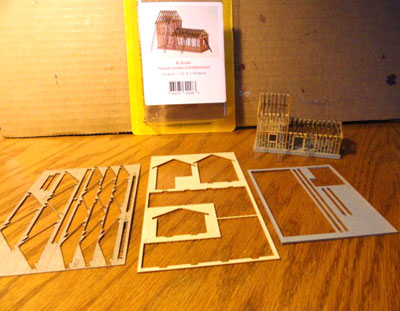
This is a laser cut kit that comes in a plastic bubble on a cardboard. Great to see, but tough to get inside. Use a pen knife to cut around the edges to the bubble is left in tack. Great place to keep all the parts, glue and tools.
Instructions are a single sheet, printed on both sides. Front shows the three sheets of wood from which all the parts have been cut. Be careful as the parts are fragile and can break very easily.
First step is to remove the foundation parts. Start by gluing the four sides to the bottom of the foundation; check the printed drawing to see that you get the bottom and top correct. It will be easier to glue these parts on the foundation rather than what is shown on the printed instructions. When dry, paint with a light gray, or concrete color. This will be the only paint needed in the rest of the assembly.
Carefully remove parts 1, 2 & 3. This is the left, right, and short end of the house. See the printed instruction for placement on the foundation. Glue them in number sequence and watch that the end is butted up against the sides and not inside.
Remove part 4, and with a toothpick, put glue on the inside of the two walls where the new all will attach. Place part 4 and watch for alignment at the top corners.
Remove part B2 (2nd floor) and again with a toothpick, put glue on the inside of the two walls. Slide B2 into place and get it level.
Remove part 5 and glue into place with the corners butted up against the sides.
Remove 12 part RS1, first floor rafters (there is one extra in case of breakage). The first one is glued right up against the second floor, but try it first to see that the notches on both sides are open. The next 10 require a LOT of patience. With a toothpick, put glue in each notch on the top of the side walls, one at a time. Then using pointed tweezers take each one and slide it into the next notch. Try to keep them parallel to help with the next step. Remove part RP1 before the glue gets a chance to set. Do not try and put glue on this part as yet. With the tweezers, hold this part and put the top notch of each rafter in it’s place. Start at the second floor end and work toward the end wall. If you can get kit up to eye level, it will be much easier to align each rafter, rather than the work area. Once are all in place, with a toothpick, glue just the two ends and let set to dry. Then, glue each rafter to part RP1.
Second floor rafters are done the same way, again with a lot of patience.
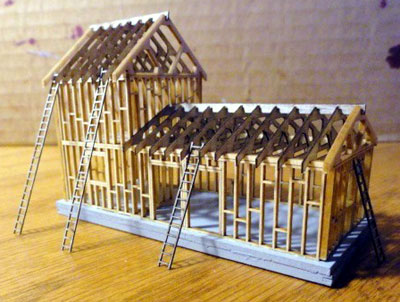
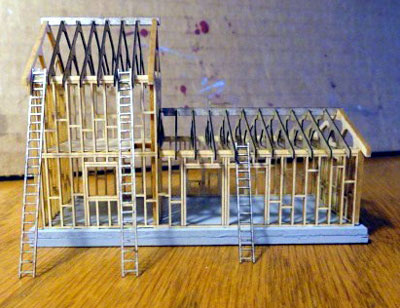

It looks very complicated, but is easy to build with no trimming or cutting.
Thanks , Jim
