Hello all,
The following documents the steps I’ve taken in bringing Kato’s magnificent F units ‘up’ to a standard that I feel approaches brass.
Without being too ‘wordy’, I’d like to share my opinion on N scale modelling; I feel it can be, indeed, a modelers’ scale, and even though the releases in the past 10 years or so have
pushed the boundaries, I believe more can be added to almost any piece of rolling stock or locomotive to really make them ‘pop’ on your layout. As much or as little as you want to add is up to you, but I feel, that, at a minimum, most N scale items can benefit from a little extra paint, whether it’s on the trucks, wheelsets, or just a little darkening of grills, etc.
Here are the steps I’ve taken to improve my ATSF Kato F7A and F7B units.These units ( the prototypes) went through a number of changes during their life, with little details added through the years…
I’m modelling the mid to late 50’s (1957 if I need to be specific), so it was necessary to compile a few reference pics of F units during these years to help me decide just what I wanted to add.
After studying a number of pics, I determined that I wanted to add these features:
Windshield Wipers
Cab sunshades
Rearview mirrors
Photo-etched grills
pilot cut levers
Photo-etched stirrups
I also wanted to convert the excellent Kato couplers to something even more ‘scale’ as well as provide closer coupling between the sets of F7A’s and F7B’s.
Also, painting the trucks a brighter shade of ‘silver/aluminum’ (The Santa Fe was known to maintian their premier passenger trains to a very high standard of service and appearance-
to the point of spraying the pilots and trucks of their lead units with silver/aluminum paint between turn arounds!) The Kato units’ trucks are molded in a silver-gray color but can benefit
with a quick coat of silver paint. In fact, this simple step, more than any other, really makes these well painted units ‘pop’.
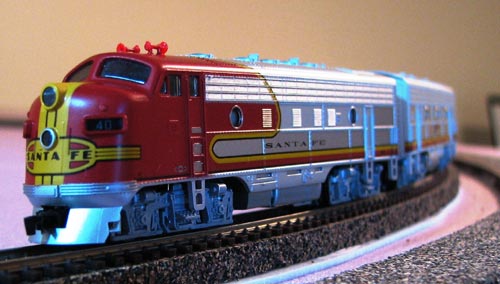
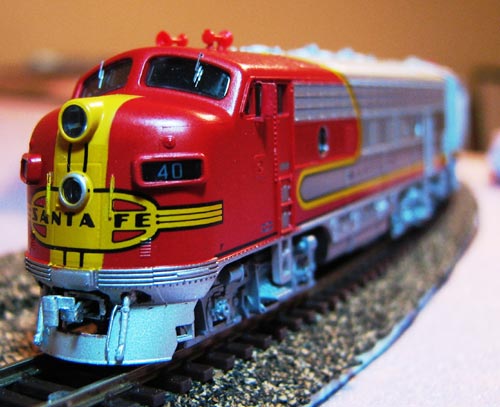
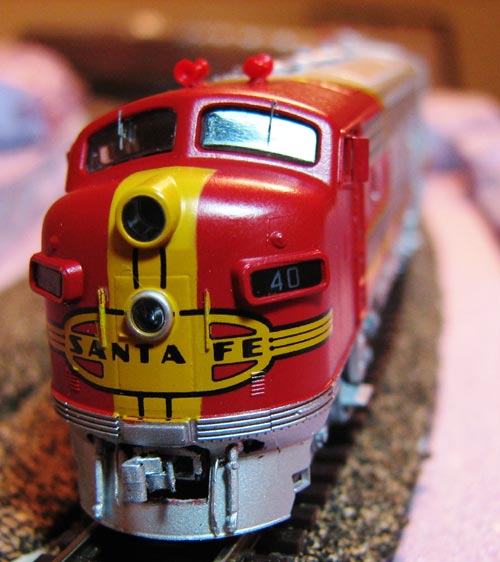
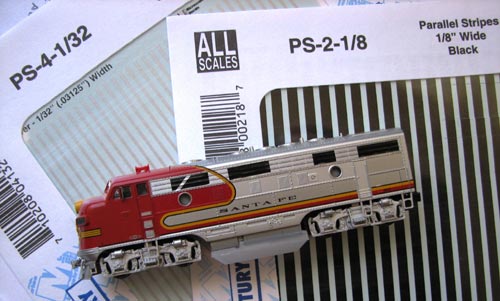
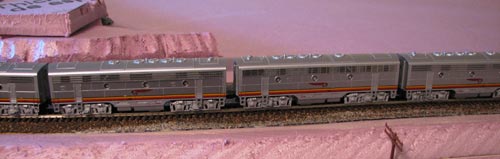
Here is a picture of the stock Kato unit, posed on the foam tabletop of my ‘in progress’ door layout….
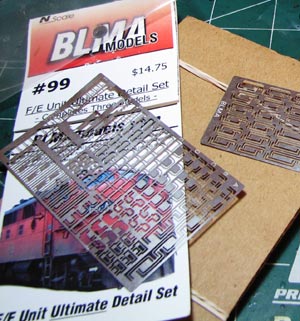
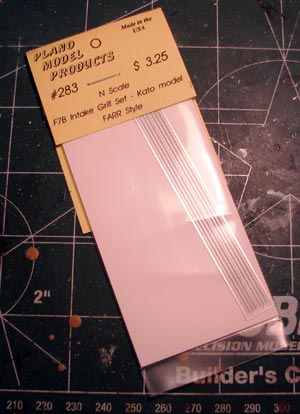
I used three different manufacturers’ photo-etch sets to provide the detail parts I wanted
BLMA’s “Ultimate E/F Unit detail set”
Gold Medal Models’ “Stirrups for Cab-Type Locomotives”

Plano Model Products F7A and F7B photo-etched grills
(FARR-vertical slit- and Horizontal styles)
Also used were BLMA’s excellent plastic air hoses.
Starting with a No. 80 drill bit in a pin vise, I drilled the holes for the windshield wipers, and the ‘starter’ holes for the unique MU hose and air hose openings in the ATSF pilots.
*NOTE-I’ve been very happy using Gorilla Brand super glue for these latest detail projects…I’ve used extra thin CA’s in the past and have had great success…but I like the viscosity
and control I’m achieving with this brand of CA. The ‘trick’ is to decant a drop of glue onto a spare jar lid, then apply the glue that way. I use a very fine tweezers to hold the part and ‘dip’ the end to be glued into the decanted drop of glue…and/or apply glue with the sharpened end of a toothpic for other types of gluing. Of course I use an optivisor!
The cab sunshades were replicated simply by applying trimmed white decal striping to the upper inside of the window ‘glass’.
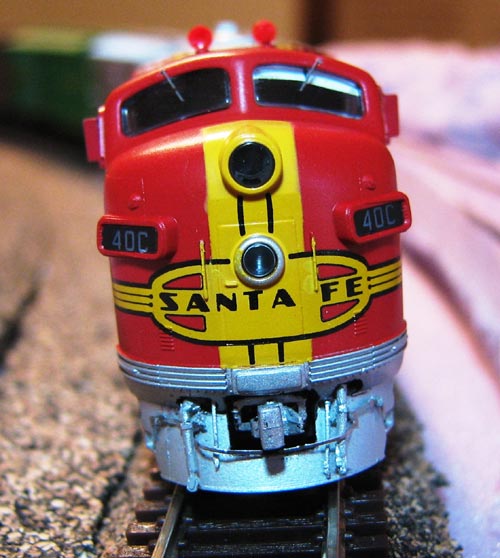
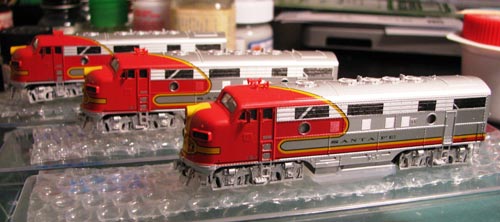
Here are pics of the units with the sunshades applied, photo-etched windshield wipers and rearview mirrors installed, the pilot holes drilled, MU hoses and air hoses applied, Microtrains Z scale couplers installed…
I also installed Red Caboose (formerly Unimate) short shank couplers to the pockets of all ends which will be MU’ed together…these provide a very nice close coupling effect!
Installing the cut levers requires the drilling of 4 holes, installing the 4 holding brackets, then dropping the cut levers into the brackets after careful shaping. Glue can then be applied with the end of a sharpened toothpic to the bracket/lever ‘join’. At first blush, it’s pretty intimidating, and the first time I attempted it took quite a while…but the follwing two units went much quicker.
The BLMA set provides a template to mark the holes for the brackets, but I didn’t use it. I ‘eye-balled’ the locations based on my collection of prototype photos, and used reference points on the pilot to mark the locations of the No. 80 holes. After dipping the ends of the brackets into the drop of CA, and inserting them into the holes, I carefully oriented them correctly before the glue had a chance to set.
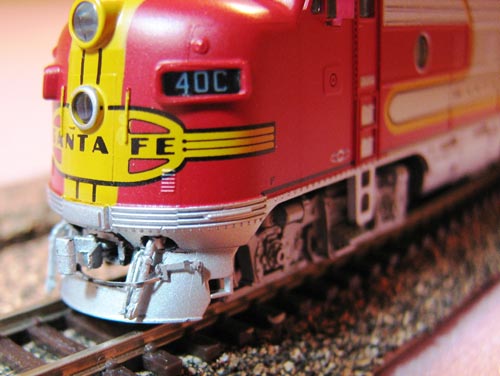
Here are pics of the cut levers applied to the pilot.
I had, originally, not intended to use photo etched stirrups, but was advised that they would really look nice, especially considering the fact that I was adding so much other little detail.
These are easy to use- fater carefully shaving the molded-on step from the body shell, mark the locations of the new parts, then simply drill no. 80 holes for the new ones…a little Gorilla Glue CA, and voila!
Pic of two of the F7A’s with the new stirrups
Knowing that I was going to use the Plano grills, but wanting to replicate the ‘see through’ effect of the F unit carbody openings, I decided on using decals to do so…these would have to be added before applying the grills. Microscale provided the correct width, I just had to provide the measurements after perusing pics of units where the openings were obvious ( I found a pic of an ATSF freight unit that had the grills removed).
I also used some silver striping to replicate some diagonal structural supports that are visible under the grills…
The black decals were applied, with numerous applications of setting solution (to get the decals to ‘snuggle’ down into the molded-in grillwork)
After they were dry, I applied some silver diagonal ‘supports’
Applying the Plano grills caused me some intial concern…these are BEAUTIFUL pieces, designed specifically for the Kato units, and overlay the molded grills perfectly. However, there is precious little area for applying glue without having the glue ‘fill’ some of the beautiful slits….
I settled on using the technique of gluing one end of the grill (After carefully aligning it), then coming back at intervals, applying a little more, ‘walking’ the grill along the length of the carbody.
I used a sharpened toothpic, and applied the glue along the outer edges of the photo-etched grill..JUST inside the edge, but not so much ‘inside’ that I would get any glue ‘in’ one of the slit openings.
The grills are VERY thin, which allows them to flex…be careful!….I had to go back, with each unit, and tack into place, areas that didn’t receive glue on the first ‘go round’..However, taking some time here, being extra careful, and not trying to ‘rush’ this process REALLY paid off! I wound up with NO visible glue and the effect of the ‘see through’ carbody openings was just what I had envisioned.
*NOTE- there are two types of grills- the FARR, or vertical slit grills-and the Horizontal style, which is molded into the Kato units. Most F7A’s were retrofitted with the FARR type, even if they were manufactured with the horizontal style…however, consult photo references for your units during your era…all of my warbonnet F7A’s will have the FARR type, as well as most of my B units, However, some of my B’s will get the horizontal style, as many of them were never retrofitted with the FARR type.
Pics of the FARR type grill applied to an F7A
Here you can clearly see through the grill…to the ‘openings’ beneath.
Here are a set of B units (two with FARR type-and one with the Horizontal type)…
These B units have not had their stirrups added yet….
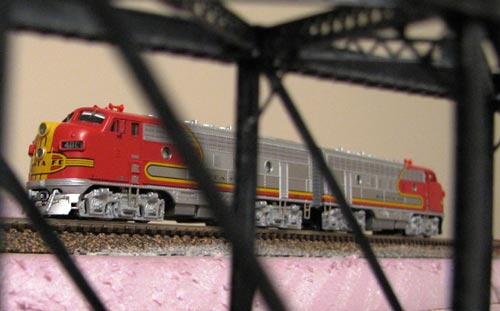
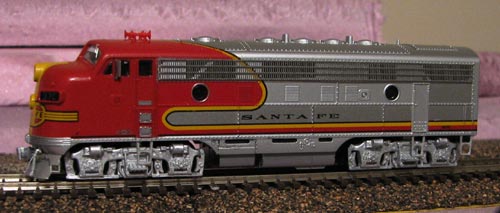
Here is a pic of an F7 ‘almost’ done…
FARR grills have been added, stirrups, and the trucks have been painted with Tamiya ‘Flat aluminum’, a color I feel represents the bright appearance of these trucks.
I have yet to add the lift rings to any of these units (waiting on more etched sets)…the lift rings will be the last detail added before I start the weathering process (these units will be ‘ever so slightly’ weathered…just a little dust and soot)
I sincerely hope my attempts to improve these great units will benefit those that choose to do as much, a little, or even more than I have done here!
Thanks for looking,
Bruce Arbo
