Article By Mike Fifer and the Albuquerque , Carnuel & Tijeras RR Copyright ©
The New TCS CN Decoder is perfect for installing in many (if not all) of the Atlas Classic Locomotives.
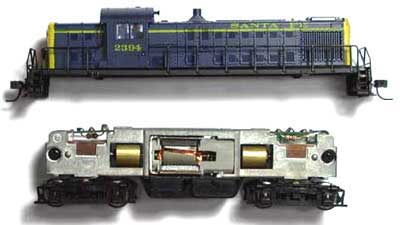
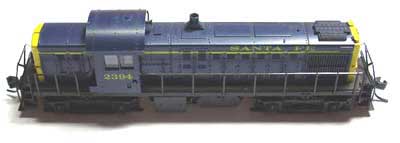
The install I will talk about was done on an early Atlas RS1.
We will start by removing the shell. Start by gently rocking the shell side to side at the rear while lifting upward. This should allow the shell to lift up from the rear and off.
Next we will loosen the two frame screws and remove the fuel tank , after loosening and PRIOR to splitting the frame , remove the front and rear trucks and try to keep thier orientaion as you set them aside on the bench. Now remove screws and nuts and remove the left frame half from the right being sure not to lose the plastic spacers in either end.
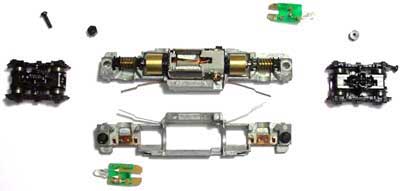
Now remove the motor and drive shafts from the frame and also try to keep their orientation correct (this is fairly critical to a smooth runner when re-assembled).
Once the motor is removed cut off the two frame contact tabs on the motor , leaving a small piece of the tab to solder to. The hole in the motor frame is the bottom side of the motor.
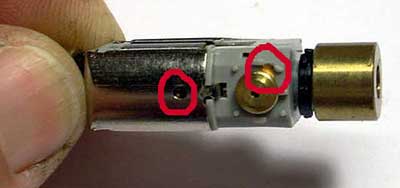
Now you will temporarily set the motor and new decoder in place in the frame and measue and cut the two motor wires ( grey to bottom and orange to top. ) then remove motor and solder the two leads to the motor using a 20-40 watt (clean tipped) soldering iron.
TIP: always use a very small amount of rosin flux on tabs and pre-tin wires and be fast on the soldering.
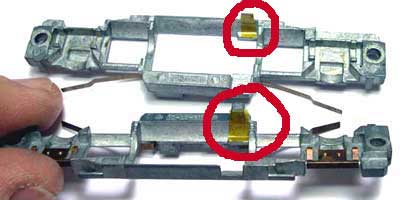
Once the wires are soldered we will place small pieces of Kapton tape or similar insulator material on both frame halves at the points shown.
TIP: Clean the frame halves in the area of the tape placement with alcohol so tape stays put!

Now the motor and shafts can go back in the right frame and the plastic spacers can go back in and left frame is installed . While doing this hold the decoder front and rear in position as well.
Once you are sure all is lined up and pinched together (insure the black rubber motor mounts are lined up in the frame, or the motor will bind up) go ahead and hold the plastic nuts in the right frame half and insert scews and start them.
At this point do one last check fo alignment of everything and insert trucks and finish tightening the screws.
Now you can measure and solder remaining wires per TCS instructions. You should end up with something like this.


Now re-install the fuel tank and go test run. If all is well re-install shell and you are now DCC Equipped!!
We hope you found this project useful and hope you had fun!
